Friday 28 June 2013

Access Your Gmail Account Without Internet Connection

Gmail Offline a free Chrome web app, which allows you to access your Gmail account without any Internet connection. With the helps of this app you can take your emails on the go and check anywhere in your laptop without any internet connection. The app allows you to read, respond to, and search mail from anywhere. Right now the plugin is only available for Google Chrome browser, so to use it you have to install Google chrome browser on your desktop.

How to Access Gmail Without Any Internet Connection

Step 1. Install Google Chrome Browser to use the Gmail Offline Plugin.
Step 2. After the Google Chrome Browser installation go to the Chrome Webstore and Download the Gmail Offline App from this link

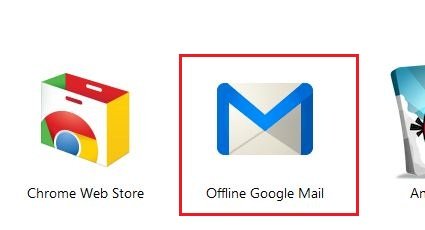
Step 3. Once Installed, you can see the Offline Gmail App icon on your Google Chrome apps page. Launch the app to access Gmail account offline.

Step 4. Now it will ask you to allow offline mail storage. If you approve, your inbox data will be stored on the computer you’re using. (NOTE - Don,t Approve it on a public computer or Cyber Cafe) If you allow, Offline Gmail will launch and start backing up your inbox.

Now next time you are offline, you can compose and send emails, archive items, read up on emails, and anything else you’d normally do. Once you reconnect to the Internet, the messages you composed offline will be sent.
To uninstall the app or delete your offline inbox from the computer you installed it on. Go to Chrome Browser address and type chrome://settings/cookies and press Enter. Now search for the “mail.google.com.” and click the “X” icon to delete it.

Watch Youtube Video Songs With Lyrics

YouTube is one of the most popular video sharing site and most of the user are using YouTube to watch video, songs, and tutorials etc. If you want to see some of your favorite Music Video, then Youtube is one of the best way to find your favorite music video and you can watch them easily on the YouTube. Now today we will share a small trick with you, which helps you to watch YouTube video songs with lyrics, with this way you can can see the lyrics of the song at the same time on your YouTube video page. Is is possible with the YouTube Lyrics browser add-on that automatically looks up and displays song lyrics.
The YouTube Lyrics browser addon is free to use and available for all popular browser such as Google Chrome, Firefox, Safari, Opera and Internet explorer. All you have to add the YouTube Lyrics browser addon on your browser and after that you can see the lyric of the video on your YouTube page. You can download the browser addon by clicking Here.

How to Watch Youtube Video Songs With Lyrics

Step 1. Go to the YouTube Lyrics browser addon and install the the addon on your favorite browser. (Click Here) The addon work fine of all the mention browsers Google Chrome, Firefox, Safari, Opera and Internet explorer. 
Step 2. Once the addon is successfully installed on your Google chrome browser and it will come into effect without having to restart the browser.
Step 3. Now play any of your Favorite video song on your Google Chrome browser andYouTube Lyrics will automatically search for the lyrics of the same song and display it in a right sidebar of the YouTube page. See the Screen Shot below.

You can also move the Lyrics windows anywhere on your screen, the best part of the addon is that it will search for the lyrics automatically. you can also search the lyrics manually from the search bar of the addon. If you don’t want (instant) lyrics, head over to the preferences section of the addon from Google Chrome settings page and disable automatic display of the panel. With this way you can YouTube Music Video with the lyrics.

Download YouTube Lyrics browser addon

How to Migrate Facebook Profile to a Facebook page

Hey, Do you want to migrate Facebook profile to a Facebook page without losing any followers. Thanks to Facebook which give you the option to turn your Facebook profile into Facebook page. With the help of Facebook Page migration you can easily move all your Facebook profile data to your new Facebook page without lose any of your follower. There are so many benefits of Facebook Page, in Facebook page you can add you friend as a admin or moderator so they can mange your Facebook page for your without using your Facebook login and password.
So today here you know how you can easily Migrate your Facebook Profile to a Facebook page. The process is so simple and take only few minute to transfer all data on your new Facebook page and create a new Facebook Fan page for your site. So lets take a look how to convert Facebook profile into Facebook page

Step 1. Login to your Facebook profile with your username and password, which you want to turn into Facebook fan page.
Step 2. Now Download all you Facebook data on your desktop, in case you lost some data on the process on migration you can recover it form the desktop.
Step 3. Now it is time to Change your Facebook Profile to a Facebook page, make sure that you are on the same Facebook profile that you want to migrate asa page. Now click this Facebook Migration link to migrate your Facebook profile.

Step 4. Now follow the on screen instruction on Facebook to transfer all your Facebook profile data into Facebook Page. After that you can appoint a new admin to you Facebook page.
That’s it, now your old Facebook profile data is transferred to your new Facebook Fan page. Now you can enjoy all Facebook Pages features, manage your new Page from a personal account or add admins to your Page.

Thursday 20 June 2013

Highly Compression Software COMPRESS 1GB Data into 10MB

KGB Archiver is the compression tool with unbelievable high compression rate. It surpasses even such efficient compression tool like 7zip and UHARC in terms of the abilities. KGB Archiver uses AES-256 encryption to encrypt archives.

System requirements

The minimum requirements for running KGB Archiver are:
  • 256 MB RAM
  • 1.5 GHz processor

Features

  • Supports native .kgb files and .zip files
  • AES-256 encryption
  • It is able to create self-extracting archives
  • Unicode is supported in both the user interface and filesystems
  • Multilanguage support (including Arabic, German, Greek, Japanese, Polish, Portuguese, Serbian, Spanish, and Ukrainian)
  • An Explorer shell extension is available for the Windows versions.


Tuesday 11 June 2013

How to Change Your Gmail Email Address

People changes their email address for lots of reasons, some didn’t like the name they first created for the email address and some decided they need a more professional email address. And some want to change it because they are married and want a new address to match their new name. So today in this guide we let you know how you can change your Gmail address without losing any incoming email from your last account. Remember currently Gmail didn’t provide any option to change the Gmail address, but with this simple trick you can create you new email address and receive all the incoming mails from your old email ID to new one. So this way you can change the Gmail address easily without losing your friends and contacts. The trick is simple and it will take only 10 to 20 minutes to complete the process. Follow the below mention steps one by one to complete the process successfully.

Steps to Change Gmail Address

Suppose your old email id is abcd@gmail.com and you want to change that email id to newabcd@gmail.com. First thing you have to do is create a new email ID from the Gmail sign up page. Go to Gmail Sign up page here and create your new account with the new email ID newabcd@gmail.com.


Once you created the new Gmail account, now it turn to sync all your old gmial account abcd@gmail.com contacts to new one. Here is the complete guide which helps you to sync contacts between Gmail accounts. Now all your old email contacts are restored on your new Gmail account. After that go to your new GMail account and send a mail to all your friends that you changes your email ID and this one is your new email ID.
Or you can use the forward option on your old gmail account abcd@gmail.com to forward all new incoming mail to your new gmail account ID newabcd@gmail.com. To do this go to your old GMail account setting page and Forward all your new incoming emails to the new address newabcd@gmail.com. Read this guide how to forward all your incoming messages automatically. With this way you can’t miss anything as you make the switch between gmail accounts.

That’s it now all you old account emails are forwarded to your new Gmail account and all your contacts are also imported to your new Gmail account.